Blog
Enabling Microsoft Copilot overall for your environment

There are certain questions I get time and time again and certain missed steps I see frequently when someone is trying to setup Copilot in their Dynamics or Power Platform environment.
I have put the key setup/configuration items below:
Accepting Terms
One of the most common mistakes is forgetting to accept ‘Terms’. In the defence of those who forget – Microsoft have put it in a completely bizarre place given the rest of the “Features” and “Behaviours” settings is in the ‘Features’ and ‘Behaviours’ section…
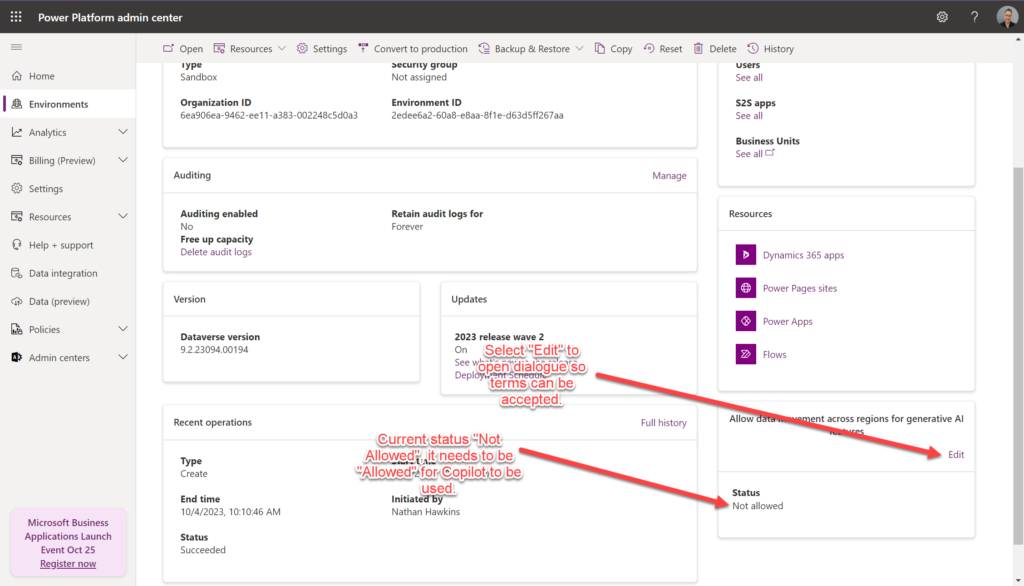
You’ll find the ‘Terms’ at https://admin.powerplatform.microsoft.com/environments/ then select the environment you wish to enable Copilot for. From the main selected environment page scroll down and you’ll see “Allow data movement across regions for generative AI features (as shown below), not the status is “Not Allowed” – select ‘Edit’:
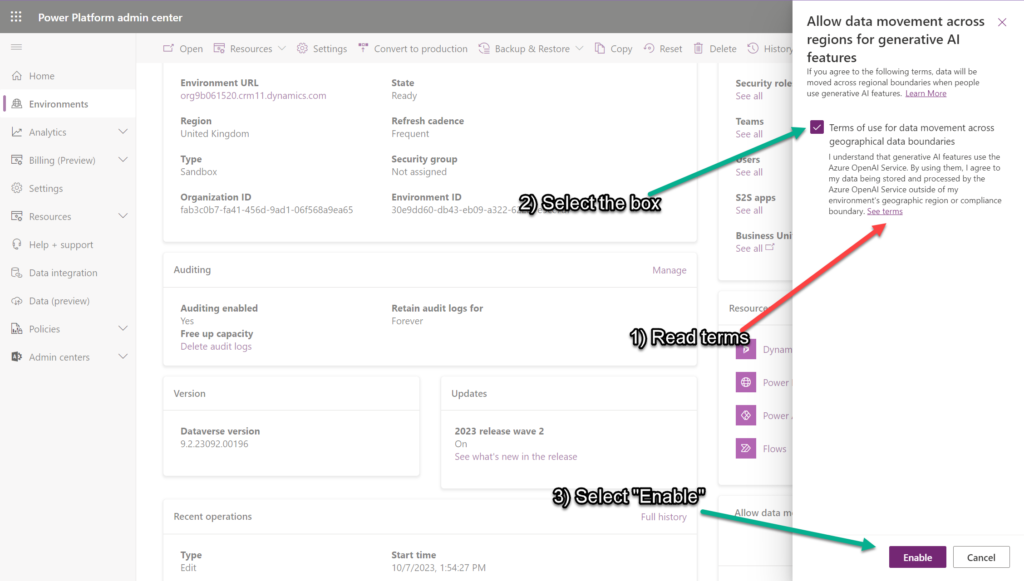
This will open up a dialogue – that will then allow you to view the Terms, and IF you accept them check the radio box and select “Enable” as shown below:
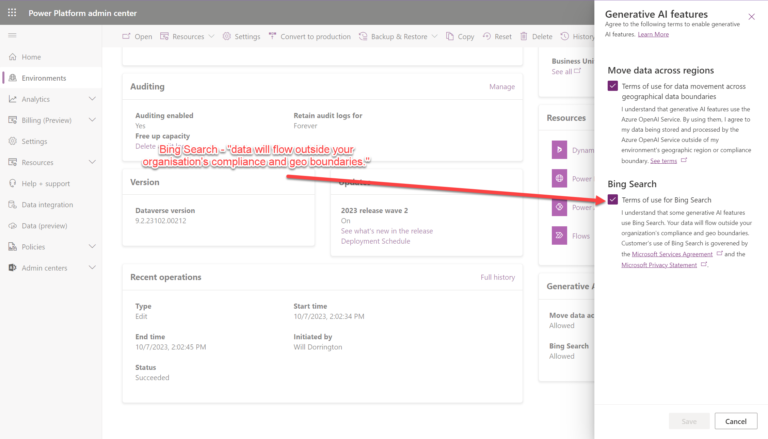
Depending on region you may also have “Bing Search” as part of your view – this explicitly allows data to move outside of your organisation and even across boundaries so be careful switching this on (shown below):
Release Channel
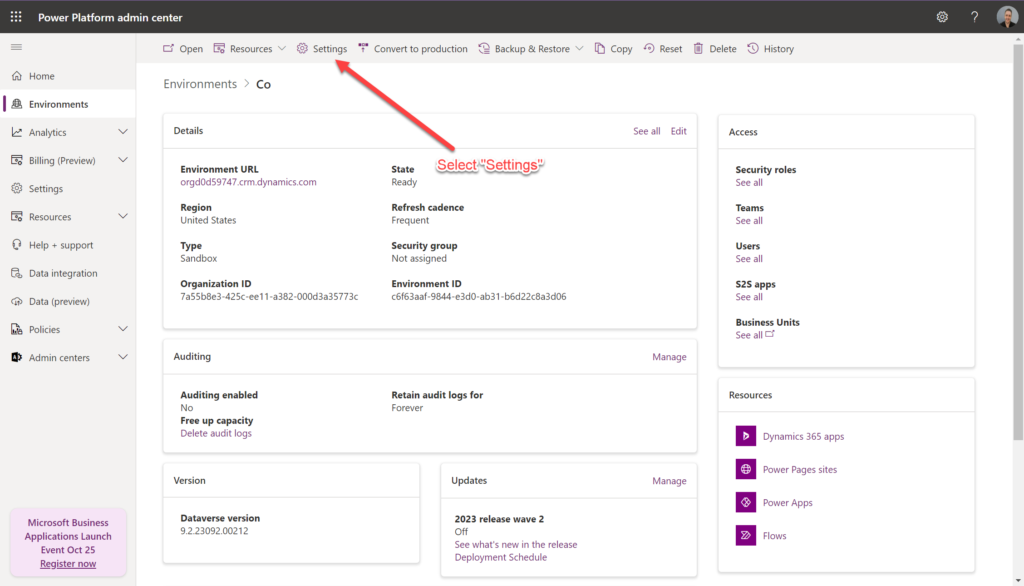
From the main environment page for the select environment. Go to “Settings”:
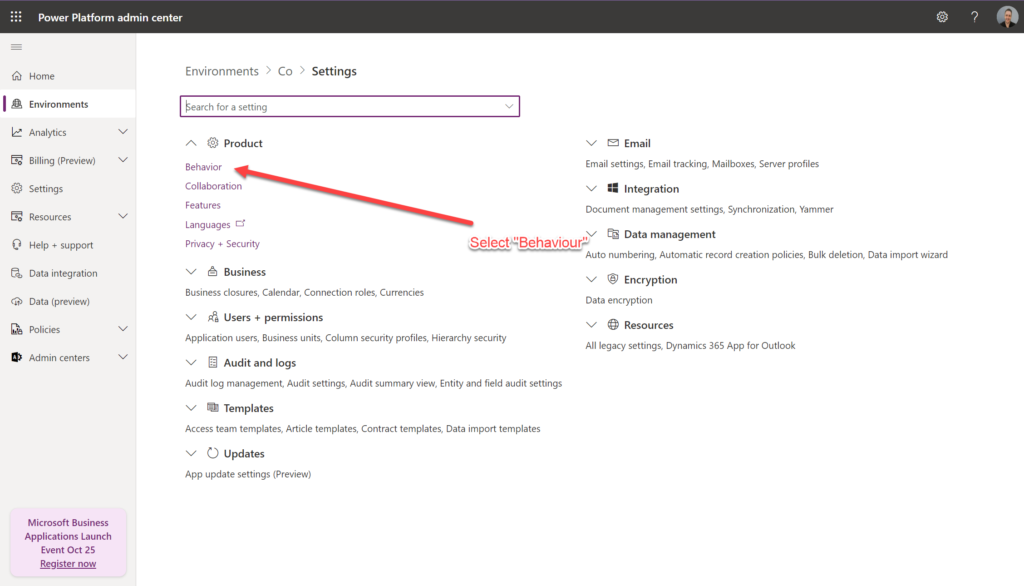
From here go to “Behaviour”:
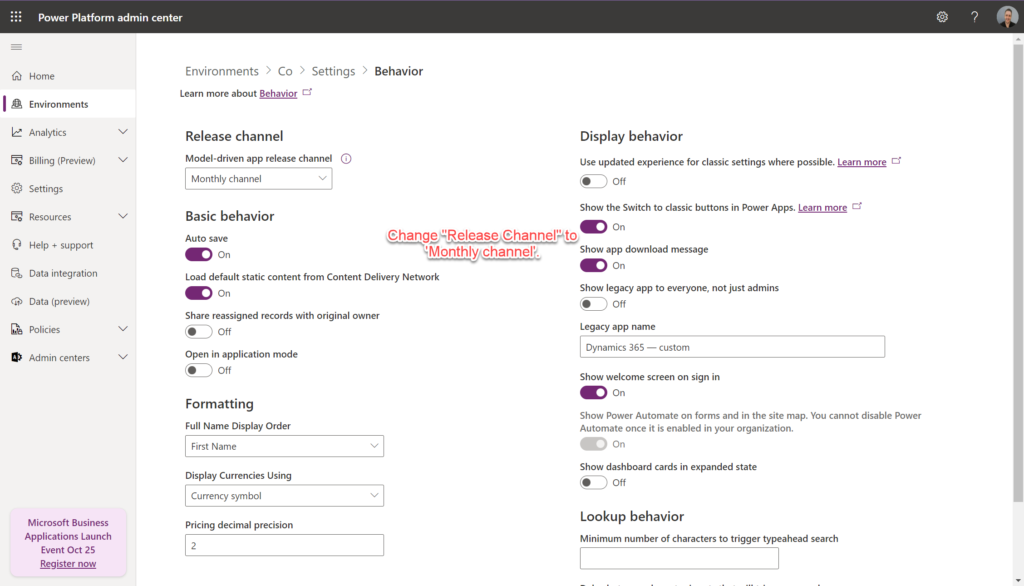
From here – under ‘Release Channel’ change the ‘Model Driven app release channel to “Monthly channel”:
Tenant Settings
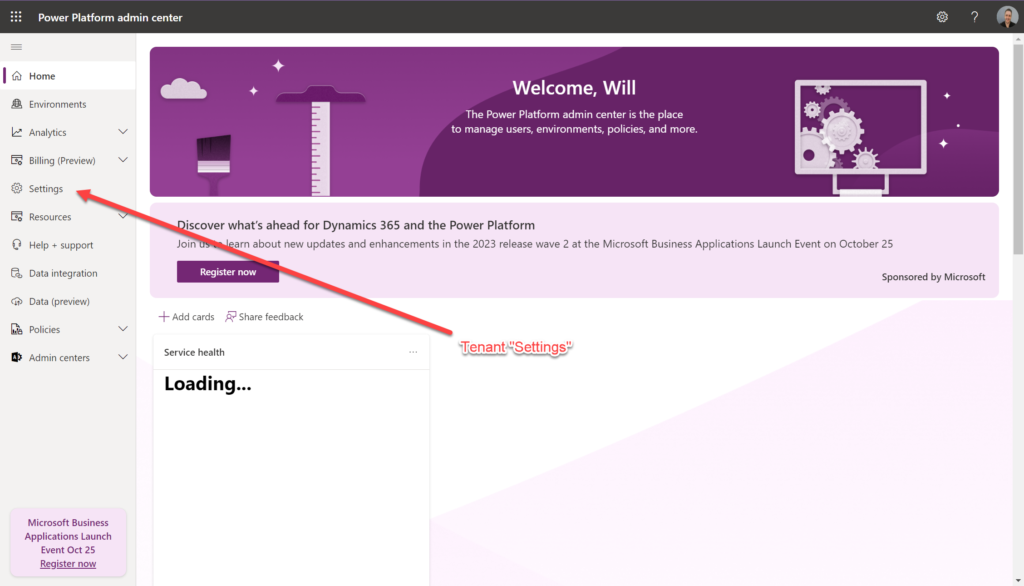
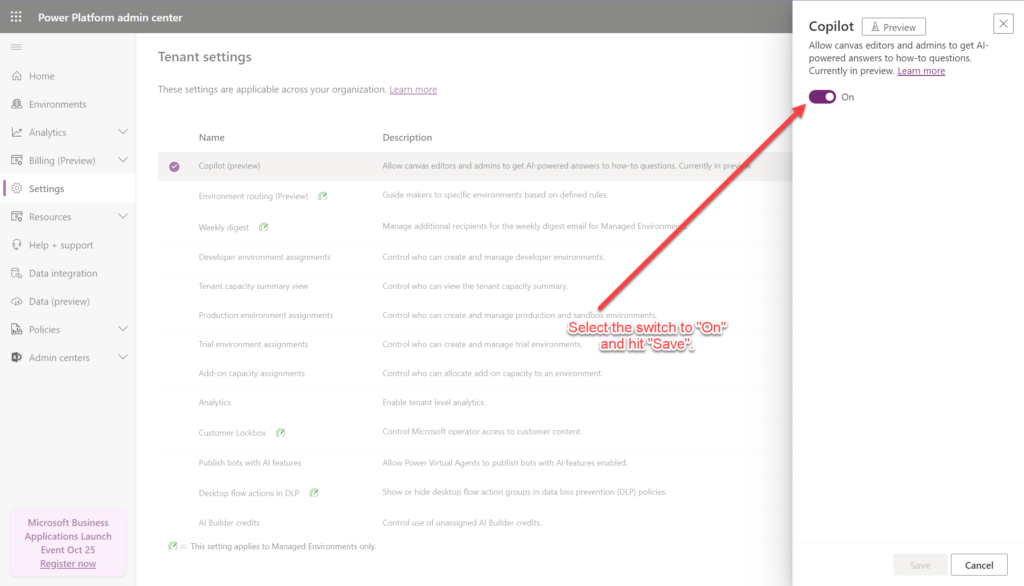
From the Admin centre (https://admin.powerplatform.microsoft.com/environments/) select “Settings” from the left-side navigation pane:
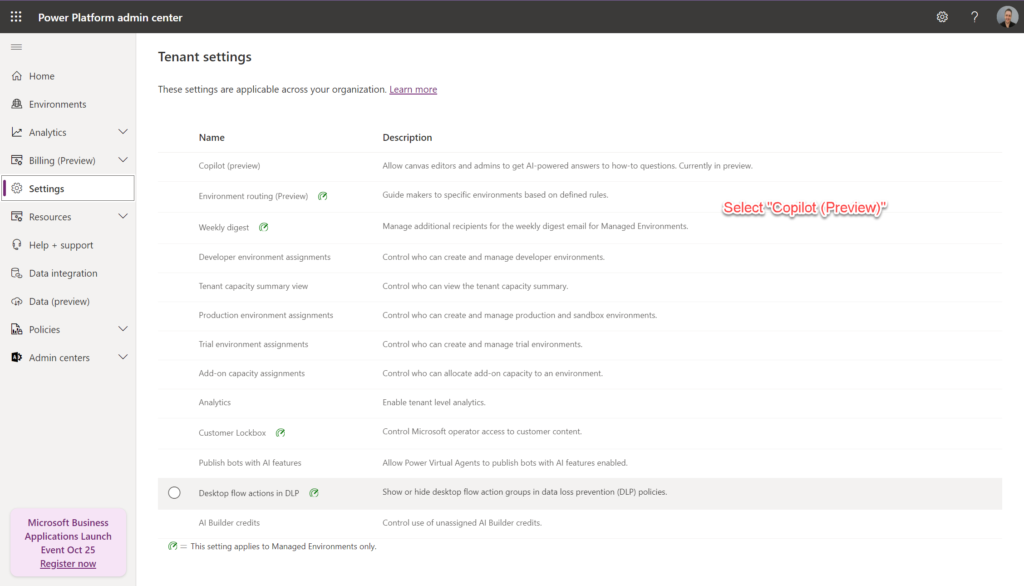
Then select “Copilot (Preview)”:
Ensure the toggle is set to “On”:
Power Apps specific settings
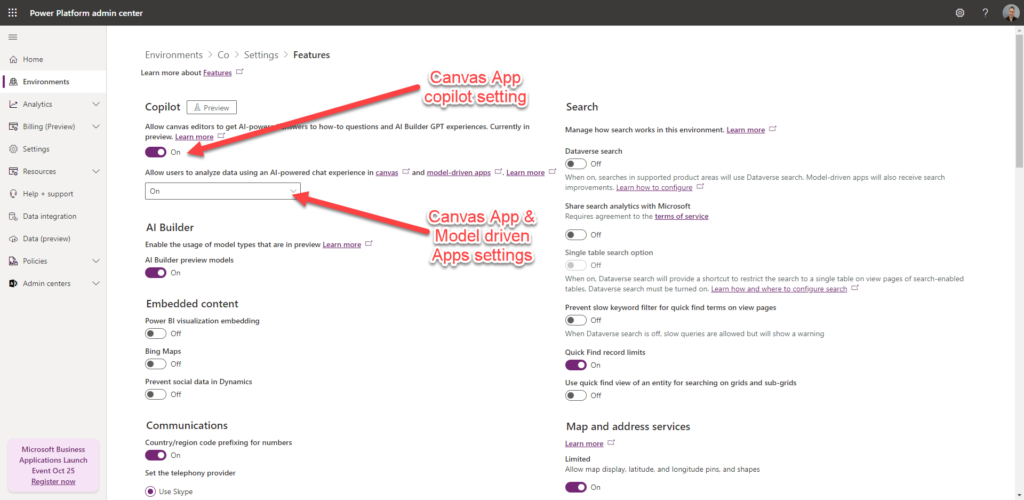
To enable the use of Copilot experiences within Power Apps (both Canvas and Model Driven). Head over to the Admin Centre (https://admin.powerplatform.microsoft.com/environments/) then select the Environment you wish to use the various Copilot Power experience in then select “Settings”, then “Features”. From here turn on the switch and dropdown to “On” as shown un the image below:
Notes:
I will continue to update this page as settings change.
